Quarantine Activities: Tie Dye DIY

In this quarantine series, I have a ton of fun at-home self-isolated DIY activities that will hopefully make social distancing a little more productive/rewarding/aesthetic. All craft materials can be found online so no need to scour the store for these items (though I highly doubt they’ll be the top of most people’s quarantine grocery list). If you have one, grab your isolation buddy/roommate and let’s get crafty (:
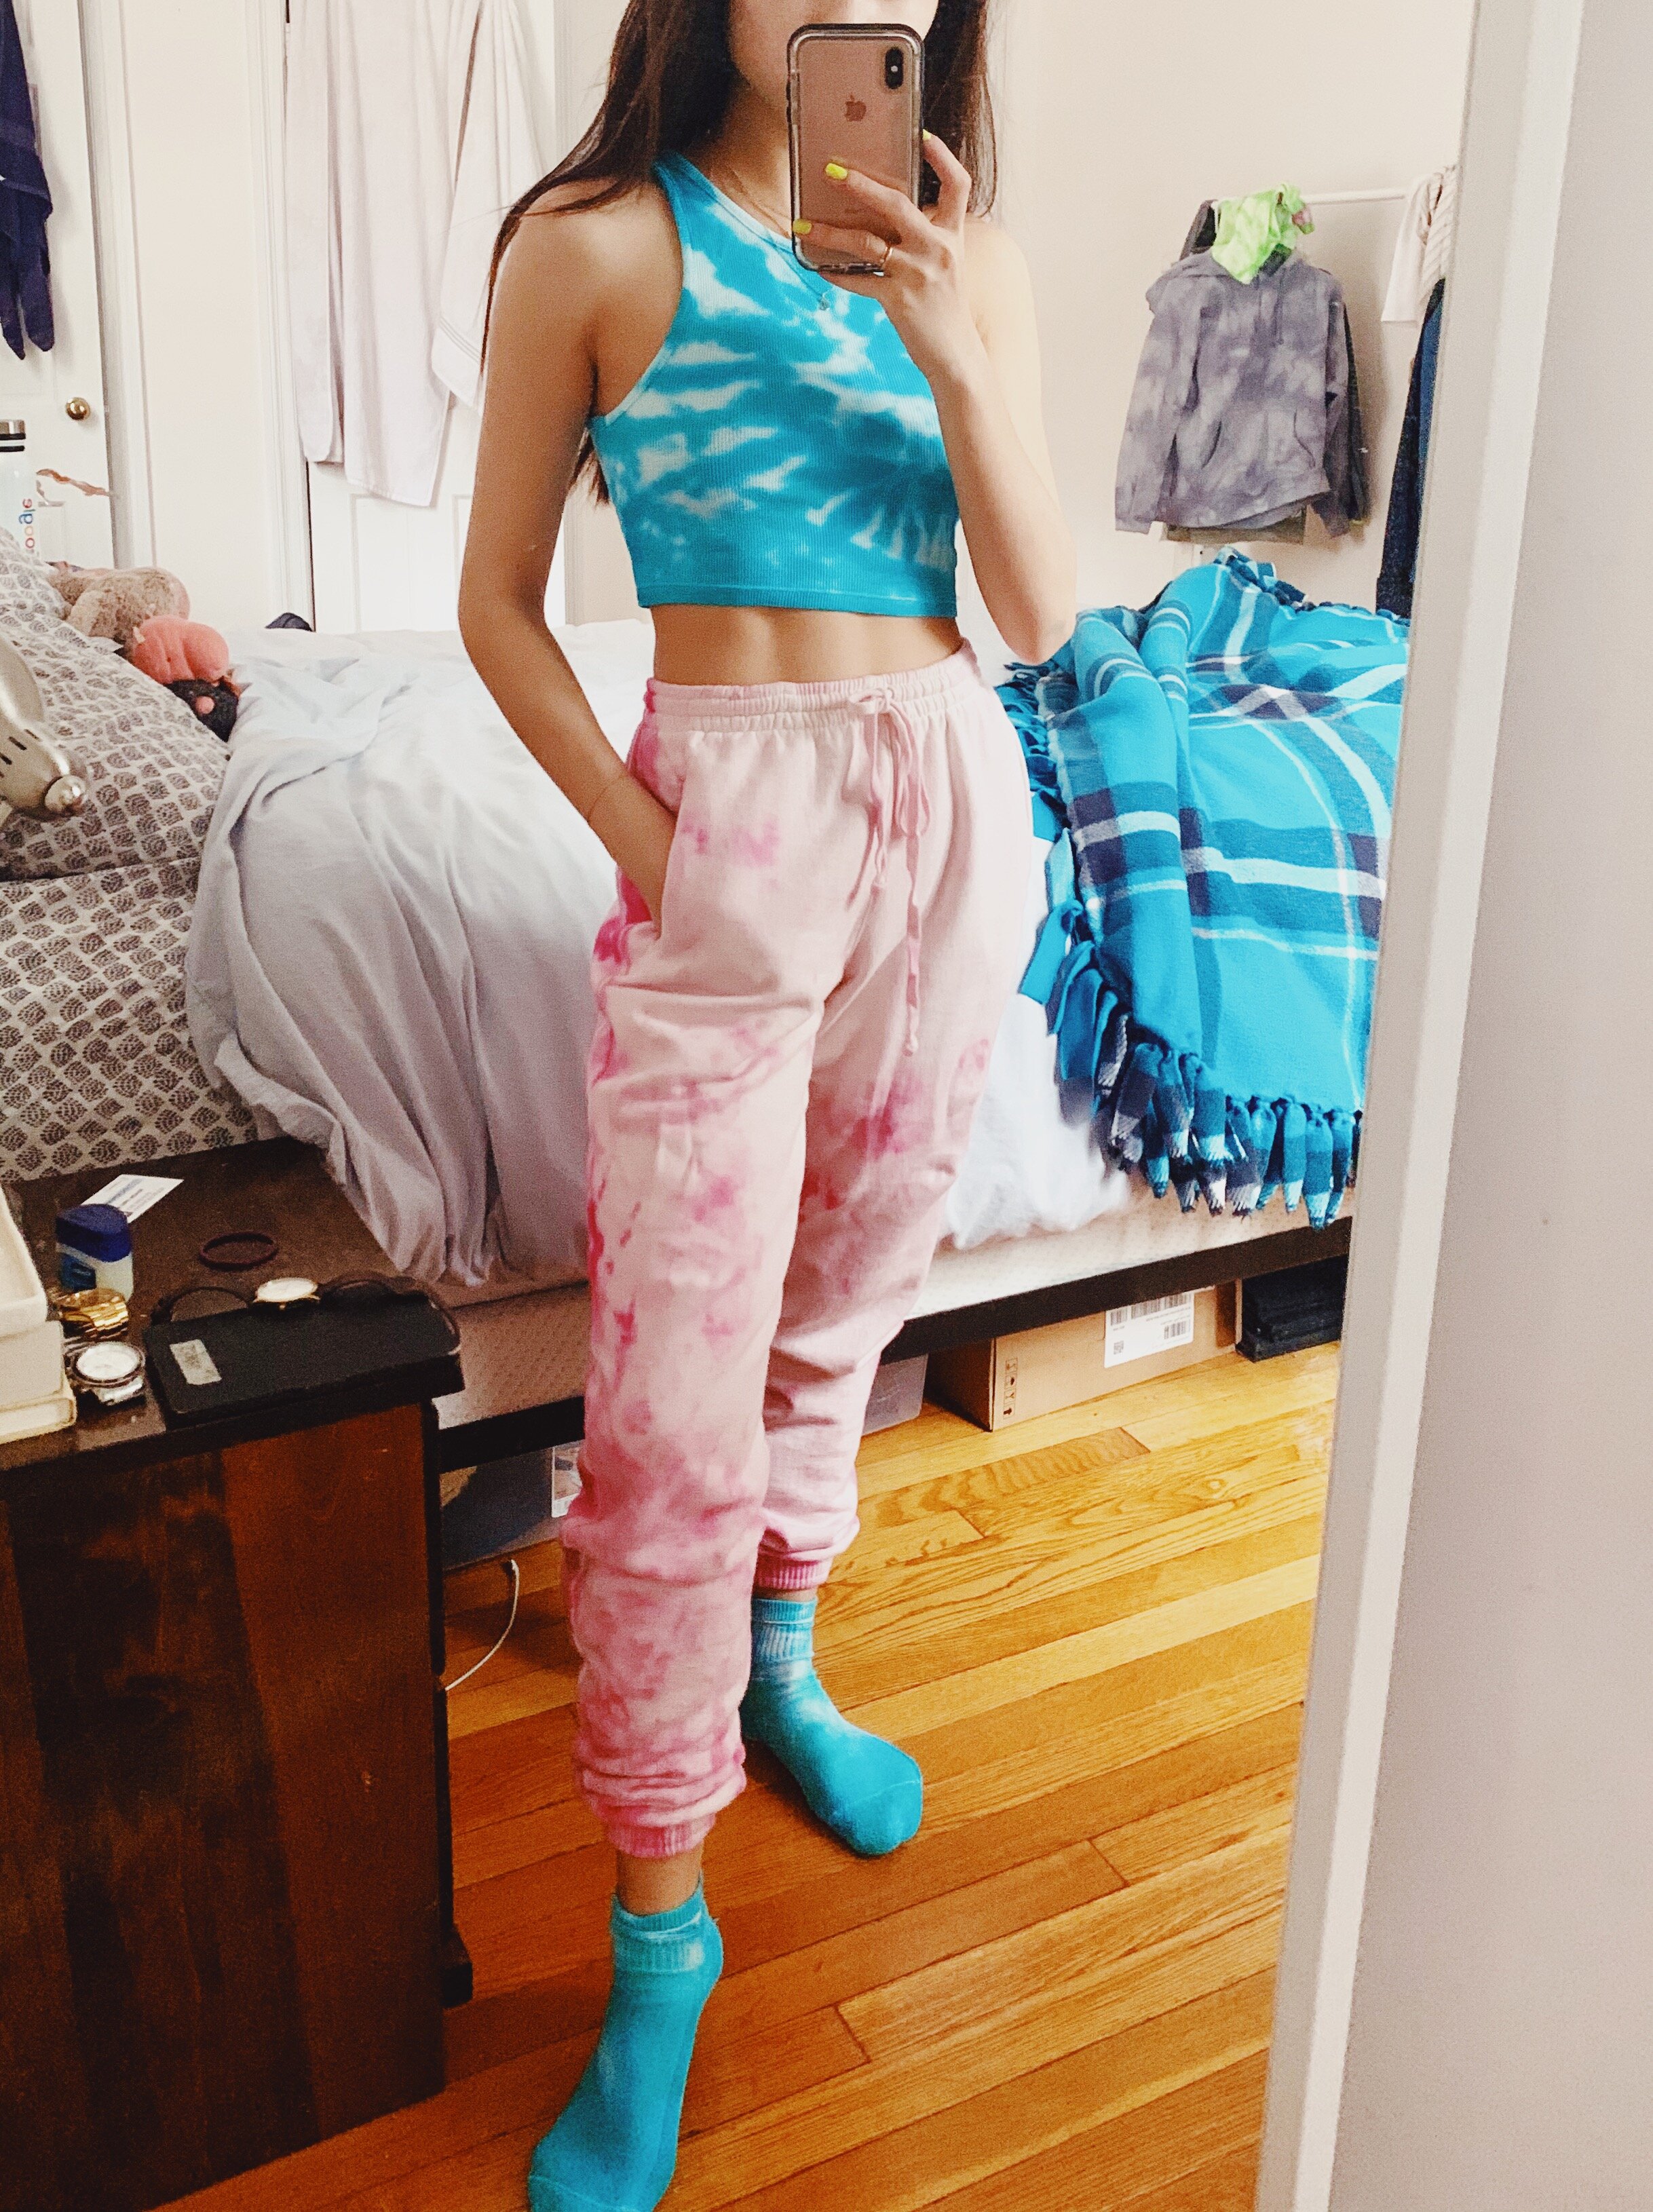
Though tie-dye is incredibly trendy this season, I have been obsessed with it since middle school. In season or not, tie-dye is surprisingly timeless and it’s not just a summer camp activity. Using this at-home tie dye kit, I’ve been churning out a ton of tie-dye pieces that have been consistently coming out beautifully.
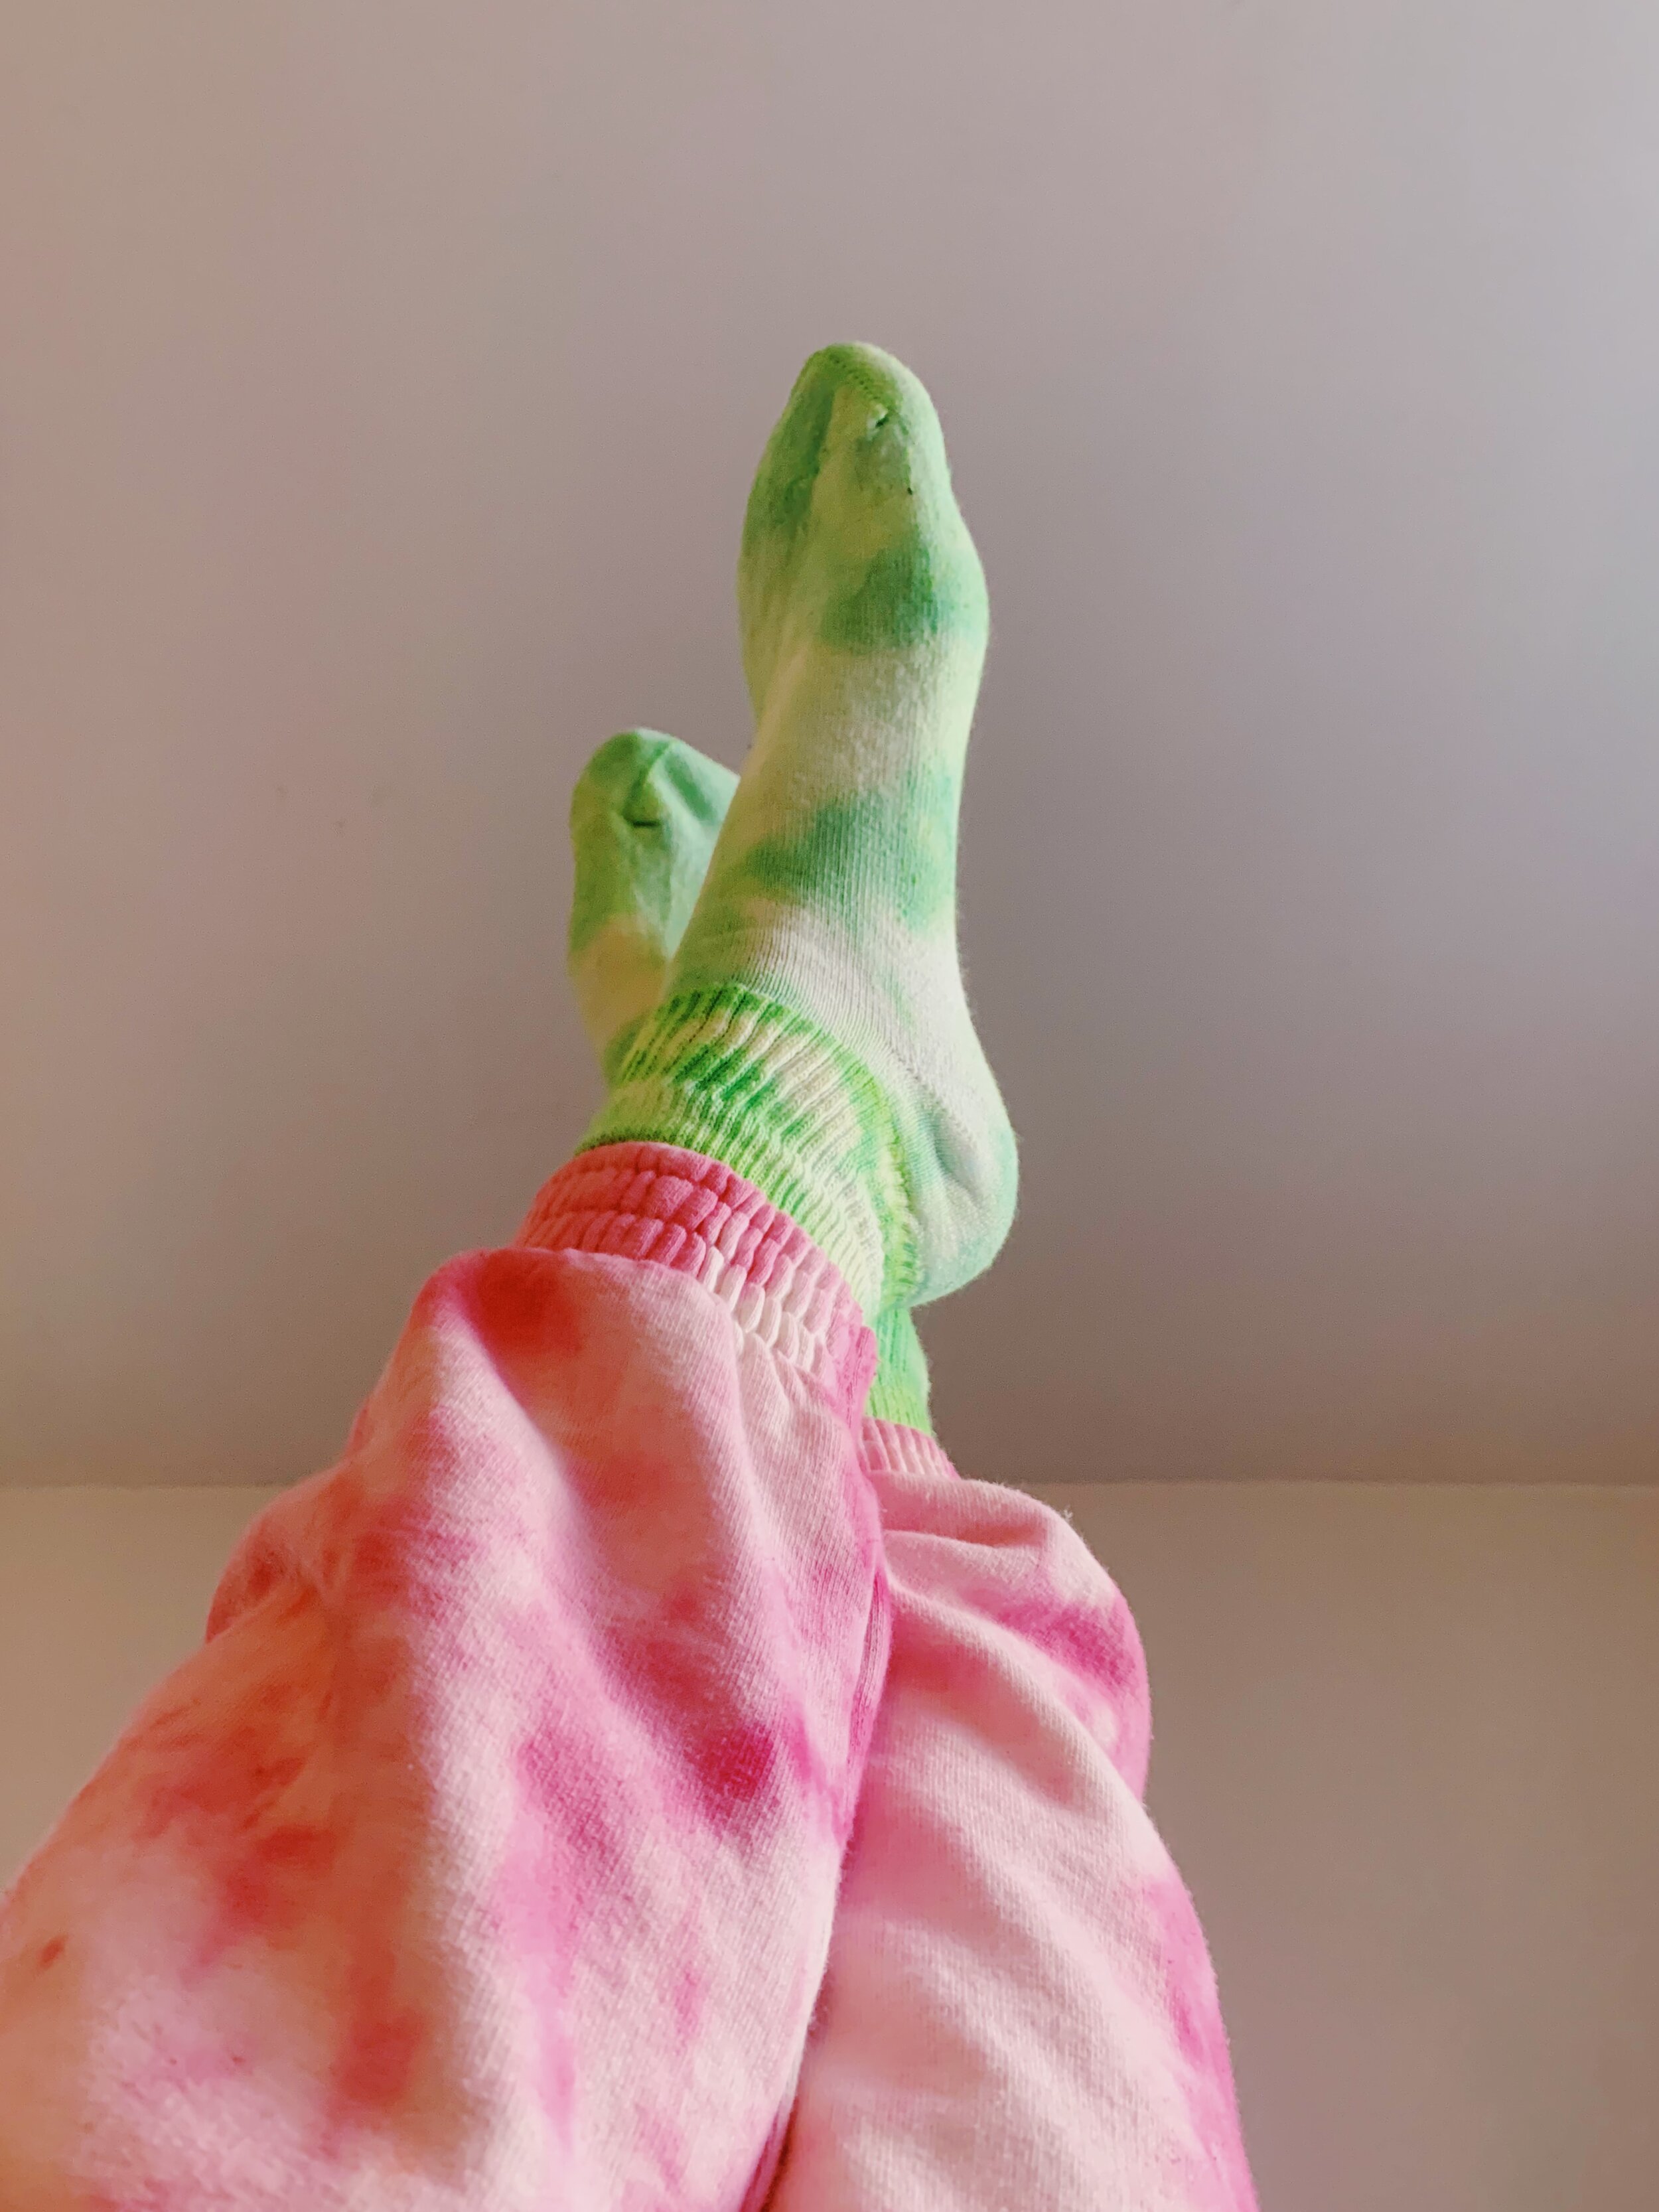
The steps are fairly simple and the product guide does a pretty good job at explaining. The kit I linked is great because it comes with all of the essential supplies- read to the end for my tips and tricks that are key to a really good tie-dye. If it’s your first-time tie-dyeing, I suggest using an article of clothing that is less bulky to get a feel of what is an appropriate amount of dye to use. Tank tops, t-shirts, and socks are great for this! Hoodies, crewnecks, and sweatpants are a little harder to navigate. Also, this is an excellent way to upcycle/give a facelift to old/stained clothing!!
Tips & Tricks
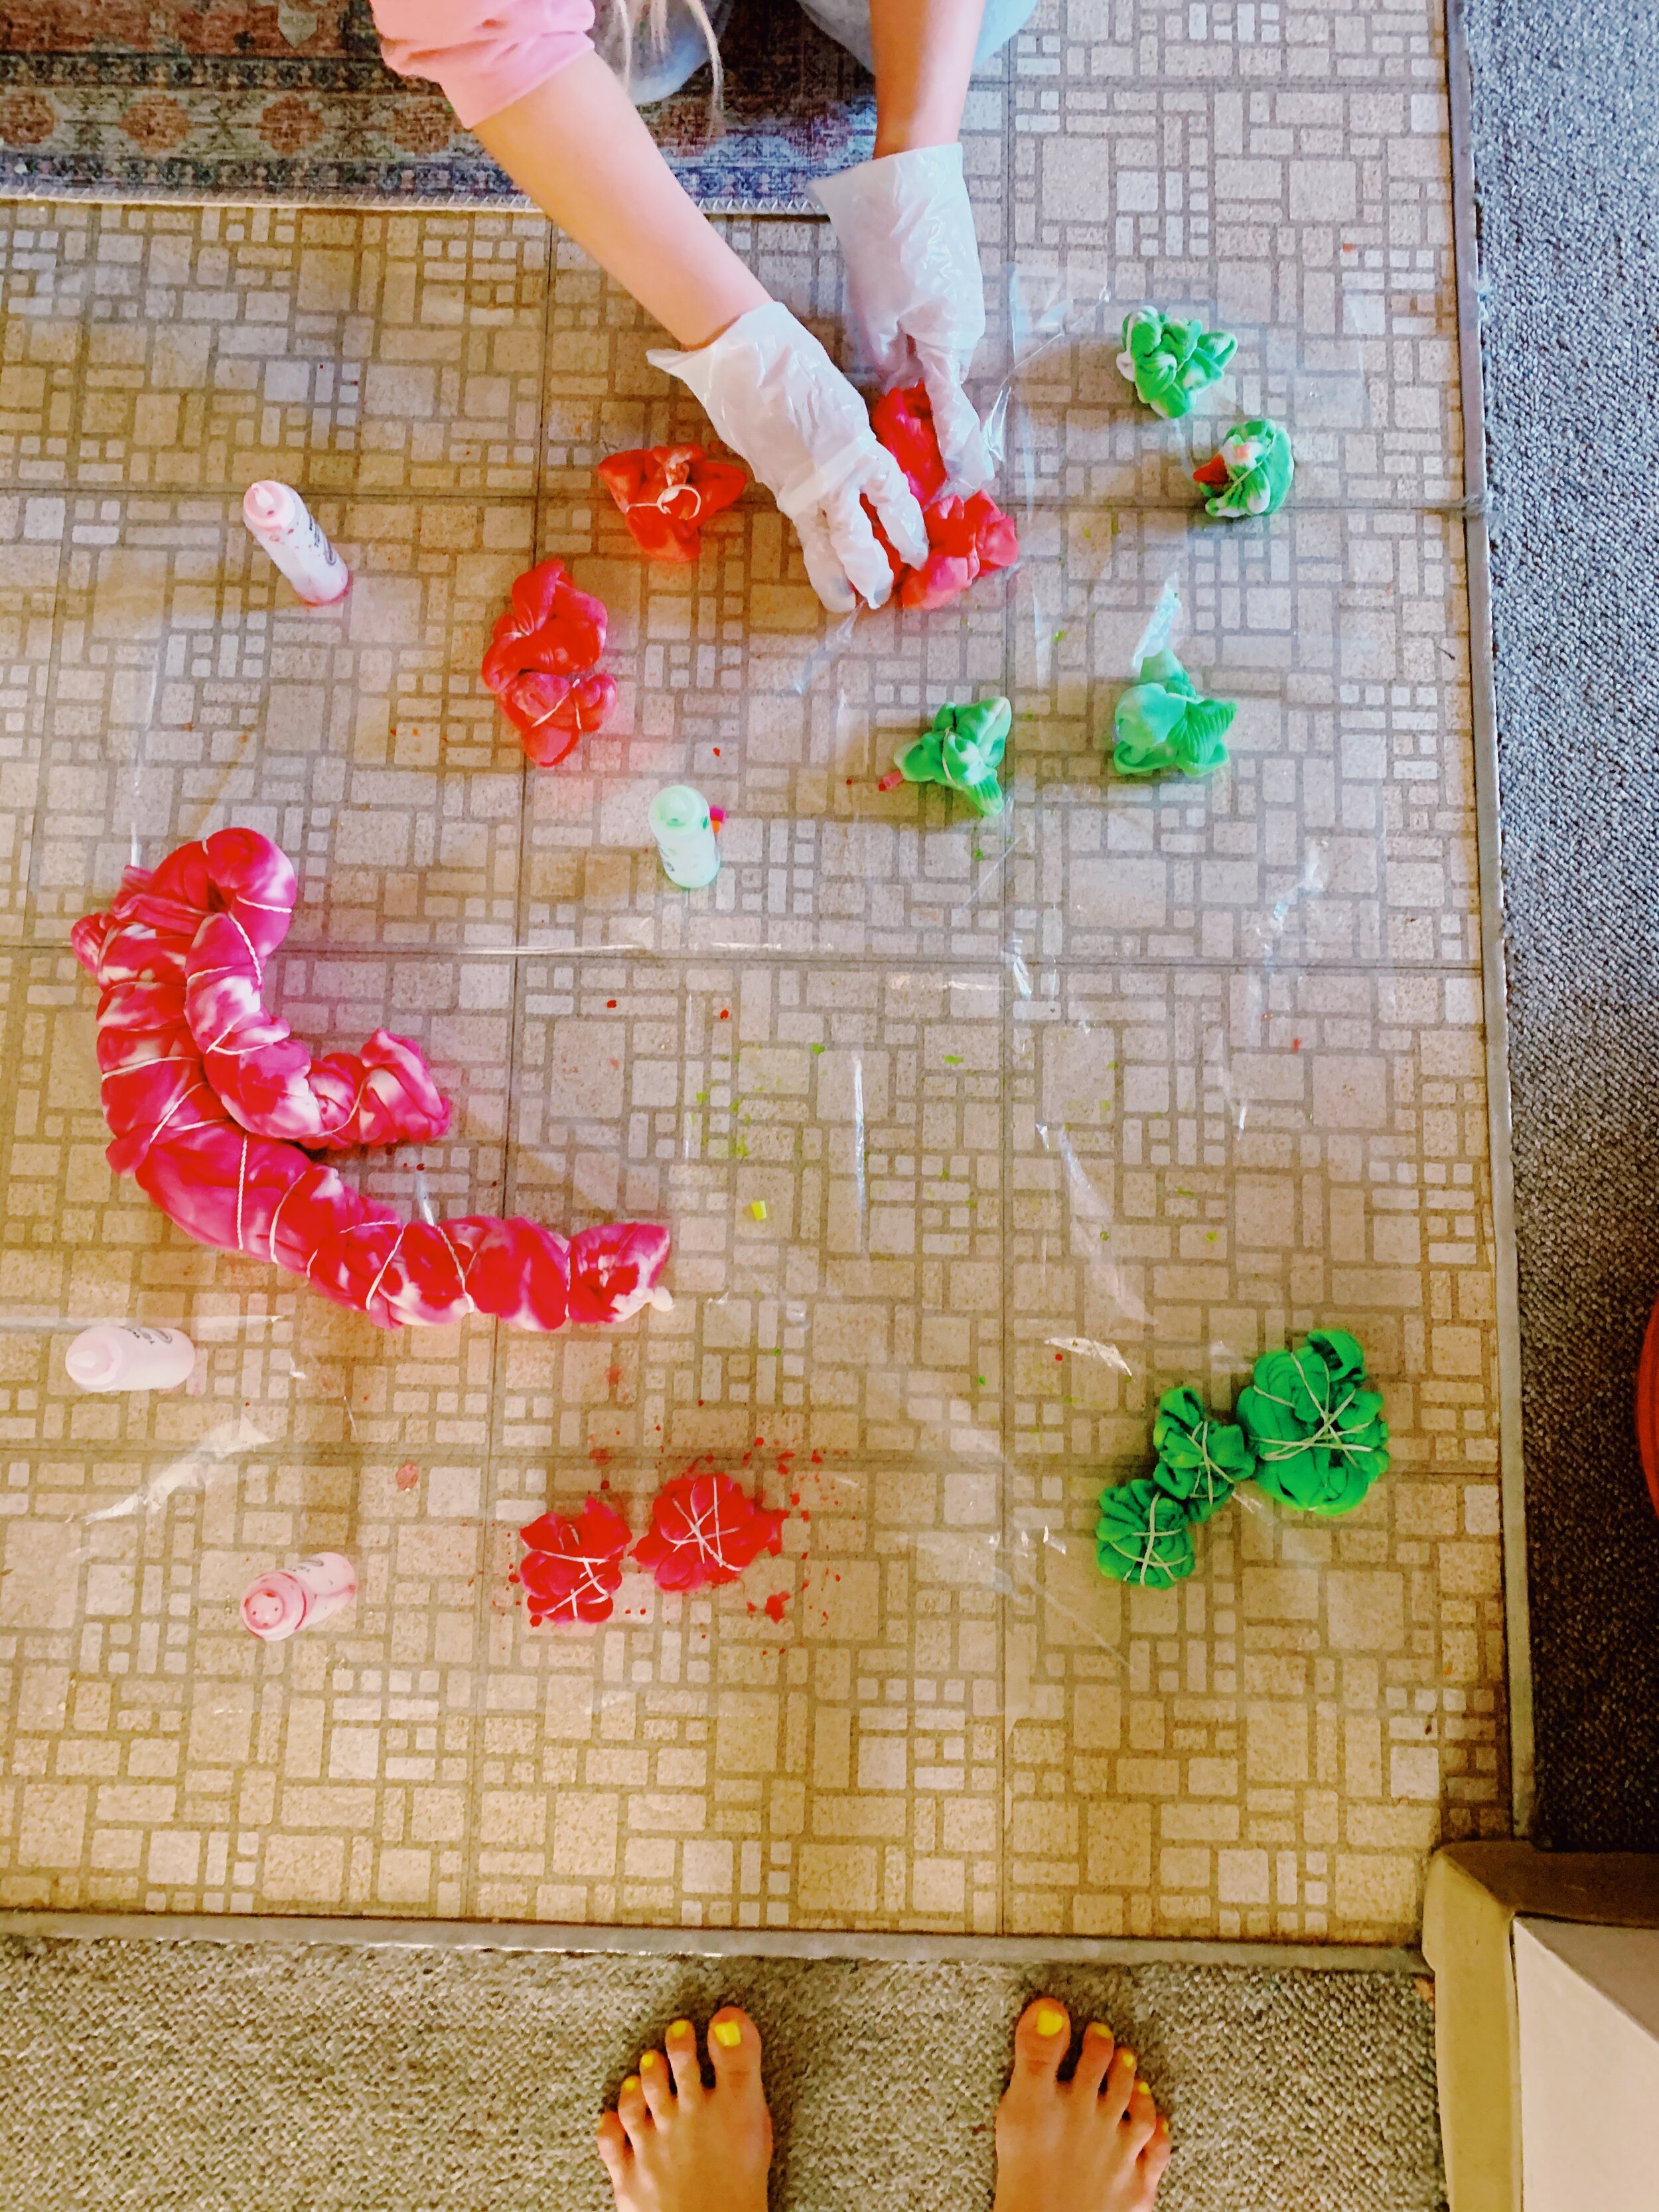
extra supplies that are useful: bucket to rinse the items out in, plastic bags or saran wrap to hold the items overnight
since you should be working with materials as close to 100% cotton as possible, make sure you’re happy with the possibility of shrinkage after your piece runs through the dryer, or pre-shrink it
create custom colors by mixing the dye powder BEFORE activating with water
soak the item of choice in water beforehand to ensure proper distribution
stick with all-natural fibers like 100% cotton
make sure your item is THOROUGHLY soaked through with dye (not just splatters). the tie-dye swirl comes from the folds of the item that the dye doesn’t reach which will not become distinct without a lot of colors- it’s better to overdo it than underdo it.
if you run out of your color and have not saturated your piece enough, pick a color in the same family (ie, yellow, orange, red… purple, blue) or change up the hues. use this to fill in the gaps
allow the item to saturate overnight (i wait longer than just 4-6 hours)
don’t be a single-use plastic offender!! wipe the plastic tarp down with water and rinse off your gloves when you’re done. i even rinse/dry the bags i use to hold the tie-dye pieces for next time. these items are simply meant to protect your hands/surfaces from dye and can do the job over and over again if you treat them well (:
i try my best to rinse out all leftover dye, but wash your pieces separate from your normal laundry for the next few washes

how to tie dye sweatpants: lay sweatpants out flat and starting from the top left corner, roll diagonally to the bottom right of sweatpants. rubber band your very long roll and dye.